Posts

Essential Keyboard Shortcuts in AutoCAD: Function and Control Keys

Function keys in AutoCAD  Function keys in AutoCAD are keyboard shortcuts that perform various tasks and help improve workflow efficiency. Here’s a breakdown of the commonly used function keys in AutoCAD: AutoCAD Function Keys and Their Uses Function Key Description F1                 Opens the Help window. F2 Expands the command line history in a separate window. F3 Toggles Object Snap (OSNAP) on/off. F4 Toggles 3D Object Snap on/off (in 3D workspaces). F5 Toggles Isoplane mode (Isometric drawing planes). F6 Toggles Dynamic UCS (User Coordinate System) on/off. F7 Toggles the display of the grid on/off. F8 Toggles Ortho mode on/off (restricts cursor movement to horizontal/vertical). F9 Toggles Snap mode on/off (restricts cursor movement to the grid). F10                Toggles Polar Tracking on/off (for specific angles). F11 Toggles Object...
Object Selection Method In Autocad

     AutoCAD में object selection methods का उपयोग objects को edit या manipulate करने के लिए किया जाता है। ये methods आपको single या multiple objects को आसानी से select करने में मदद करते हैं। यहाँ प्रत्येक selection method का विस्तार से विवरण दिया गया है: 1. Window Selection Description : Used to select objects within a defined rectangular area. How It Works : Click the first corner of the rectangle and drag to the opposite corner from left to right . Only objects entirely within the rectangle are selected. Use Case : Precise selection of objects that are completely enclosed in a specific area. 2. Crossing Selection Description : Similar to window selection, but it selects all objects that are either entirely or partially within the defined rectangle. How It Works : Click the first corner of the rectangle and drag to the opposite corner from right to left . Any object that intersects or touches the rectangle will be selected. Use Case : Useful when objects partially overl...

Step-by-Step Instructions for Drawing and Editing Polylines in AutoCAD

Image
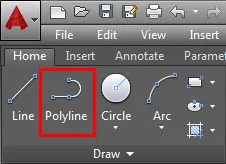
     AutoCAD में Polyline एक ऐसा टूल है जो connected sequence of line segments और arcs को एक single object के रूप में treat करता है। यह designing और drafting के लिए highly flexible है, क्योंकि इसे पूरे object के रूप में manage और edit करना आसान होता है। Polyline में straight lines, curves, variable widths और open या closed shapes शामिल हो सकते हैं। A polyline is a connected sequence of line segments created as a single object. You can create straight line segments, arc segments, or a combination of the two. Polyline का उपयोग करने के कारण (Reasons to Use Polylines) 1. Single Object Management      Polyline को एक single object के रूप में treat किया जाता है, जिससे इसे select, move, copy, और modify करना आसान होता है, अलग-अलग line segments या arcs की तुलना में। 2. Ease of Editing      Polyline को आसानी से PEDIT command या grip editing का उपयोग करके edit किया जा सकता है। इससे आप Vertices add या remove कर सकते हैं। Straight segments को arcs में या a...

AutoCAD Basics: Navigating Your Drawing with Zoom and Pan

Image
Zoom Command      AutoCAD में Zoom कमांड का उपयोग ड्राइंग को ज़ूम इन या ज़ूम आउट करने के लिए किया जाता है ताकि आप ड्राइंग के छोटे या बड़े हिस्सों को विस्तार से देख सकें। यह कमांड व्यू को एडजस्ट करने के लिए बहुत उपयोगी है, विशेष रूप से जब आपको किसी जटिल ड्राइंग पर काम करना हो। नीचे Zoom कमांड के बारे में डिटेल दी गई है:      AutoCAD में Zoom Command को Navigation Panel के माध्यम से उपयोग करना बहुत आसान है। इसके लिए पहले यह सुनिश्चित करें कि Navigation Panel स्क्रीन पर दिख रहा है। अगर यह पैनल नहीं दिख रहा है, तो इसे ऑन करना होगा। Navigation Panel आमतौर पर स्क्रीन के दाईं ओर दिखाई देता है। Navigation Panel से Zoom Command का उपयोग करके आप विजुअल कंट्रोल को आसानी से मैनेज कर सकते हैं। Navigation Panel को ऑन या ऑफ करना Navigation Panel को ऑन/ऑफ करने के लिए निम्नलिखित स्टेप्स का पालन करें: View Tab से:टूलबार में View Tab पर जाएं। Viewport Tools सेक्शन में Navigation Bar विकल्प को चुनें। यह विकल्प Navigation Panel को ऑन/ऑफ करता है।         ...

Mastering the Line Command in AutoCAD: A Comprehensive Guide

Image
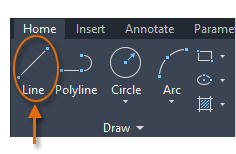
AutoCAD में "Line" कमांड का उपयोग रेखा (लाइन) बनाने के लिए किया जाता है। Line Command का उपयोग: Command Line पर "Line" या "L" टाइप करें और Enter दबाएँ। Start Point क्लिक करें। Next Point चुनें या उसकी Coordinates टाइप करें। Enter दबाएँ या ESC दबाकर कमांड समाप्त करें। Keywords: Undo: पिछला पॉइंट हटाने के लिए। Close: आखिरी पॉइंट को स्टार्ट पॉइंट से जोड़ने के लिए। Specify Next Point: अगला बिंदु बताने के लिए। Enter: कमांड को समाप्त करने के लिए। ESC: कमांड को रद्द करने के लिए। AutoCAD में लाइन ड्रॉ करने के कई तरीके होते हैं। यहां पर विभिन्न तरीकों को समझाया गया है: 1. सीधे पॉइंट्स क्लिक करके: Line Command चालू करें ("L" टाइप करें और Enter दबाएँ)। माउस से ड्रॉइंग एरिया में एक-एक करके पॉइंट्स क्लिक करें। Enter दबाकर कमांड समाप्त करें। 2. Coordinates का उपयोग करके: Command चालू करें और पहले पॉइंट की Coordinates (जैसे, 0,0) टाइप करें। अगले पॉइंट के लिए Coordinates टाइप करें (जैसे, 5,5)। यह विधि सटीकता के लिए उपयोगी होती है। 3. डायमेंशन और एंगल के साथ: लाइ...

Features and Uses of OSNAP (Object Snap) in AutoCAD

Image
  AutoCAD में OSNAP (Object Snap) की विशेषताएँ और उनका उपयोग AutoCAD में OSNAP (Object Snap) एक ऐसा फीचर है, जो ड्रॉइंग करते समय सटीक पॉइंट्स को सेलेक्ट करने में मदद करता है। यह विशेष रूप से तब उपयोगी होता है जब हमें ऑब्जेक्ट्स को एक-दूसरे से जोड़ना या एक निश्चित पॉइंट पर ले जाना होता है। आपको ड्रॉइंग में मौजूद ऑब्जेक्ट्स के महत्वपूर्ण जियोमेट्रिकल पॉइंट्स (जैसे Endpoint, Midpoint, या Center) पर स्नैप करने में मदद करता है। OSNAP को कैसे उपयोग करें: Command Line से : Command: OSNAP टाइप करें। Enter दबाएं। अपनी पसंद के Object Snap मोड्स को सेलेक्ट करें। Shortcut Key से : कीबोर्ड पर SHIFT + Right Click करें। एक पॉपअप मेन्यू खुलेगा, जहां से आप सीधे किसी भी OSNAP मोड को चुन सकते हैं। OSNAP Toolbar से : Status Bar (AutoCAD विंडो के नीचे) पर OSNAP आइकन पर क्लिक करें। इसे ऑन/ऑफ करने और मोड्स सेलेक्ट करने का विकल्प मिलता है। F3 Key: OSNAP को जल्दी से ऑन/ऑफ करने के लिए।      OSNAP Modes और उनकी उपयोगिता                 ...